In This Article
ADVERTISEMENTS

A fun and engaging craft to hone your little one’s motor skills and creativity!
Thank you for reading this post, don't forget to subscribe!
Age Range – 3 – 4 years
Primary Skills – Fine motor skills, hand-eye coordination
ADVERTISEMENTS
Materials:
- Paper plate/chart paper
- Plain paper/newspaper
- Cardboard (optional)
- Ribbons/coloured paper/magazine pages
- Paints
- Containers and paintbrush
- Scissors
- Glue
- Pencil and ruler
- Stapler/tape (optional)
Instructions:
- Let’s begin by drawing and cutting out all the elements needed to make the turkey craft.
- Take a paper plate or draw and cut a plate-sized circle out of chart paper for the body.
- For the head, let your child trace a bowl-sized circle on cardboard (cereal, tea, or delivery box), or chart paper, and you can cut it out.
- To make the eyes, help your child draw the figure ‘8’ (make it nice and fat!), and you can carefully cut out its outline from plain paper or newspaper.
- For the nose, draw and cut out a triangle from plain paper or newspaper.
- To make the tongue, help your child draw a long and narrow ‘U’ shape on plain paper or newspaper, join the open ends with a line, and carefully cut it out.
- For the legs, draw on cardboard or chart paper (same as used for the head) two rectangles that connect to narrow W-shaped feet and cut them out carefully.
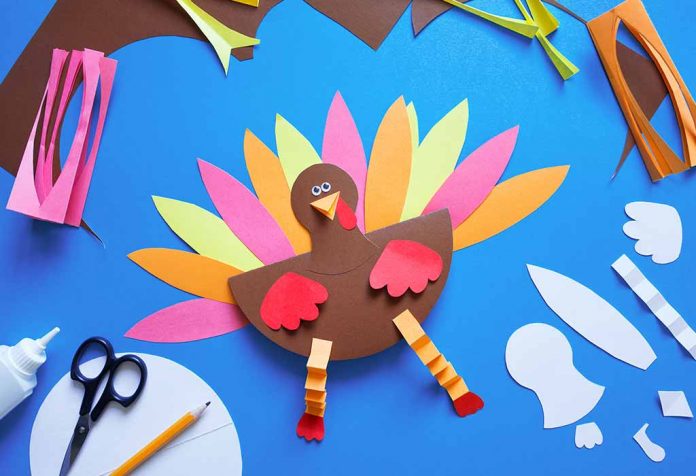
- Lastly, to make the ‘feathers’, if you do not have ribbons to spare, cut out about 18 – 20 long, narrow strips from coloured paper, newspaper, or magazine pages (see image for reference). Make sure to use the bright, colourful magazine pages for these strips!
- Once all the elements are ready, it’s time to get painting! Set out different paints in separate containers for your child, and let him have a go at them!
- Paint the body in light brown.
- If chart paper has been used for the head and legs, paint them dark brown.
- Make the nose orange.
- Make the tongue pink.
- Draw two dots in the ‘8’ shape of the eyes (refer to image).
- If strips of the newspaper have been used for the feathers, help your child colour them in bright colours!
- Let all the paintings dry thoroughly.
- Now, let’s get pasting!
- Let’s start with the feathers. Help your child fold over each paper strip, and either glue or staple the ends together.
- Next, paste the head in the middle centre of the body.
- On the head, paste the nose, tongue, and eyes as shown.
- Then, paste the two legs at the bottom.
- Lastly, glue or staple the feathers all around the sides of the body! (See image for reference.)
The cute little turkey is ready to display! Wasn’t that so much fun?
ADVERTISEMENTS


