


In This Article
ADVERTISEMENTS

Your child will love this super fun toy-making activity!
Thank you for reading this post, don't forget to subscribe!
ADVERTISEMENTS
Age Range – 4 – 6 years
Primary Skills – Fine motor skills, paper folding, paper cutting
Materials:
- Coloured paper/newspaper
- Paints/crayons
- Scissors
- Glue
- Pencil
Instructions:
- Let’s start by taking a square sheet of coloured paper or newspaper. If using newspaper, let your child paint it over in brown colour (or any other shade he likes!), and let it dry before folding.
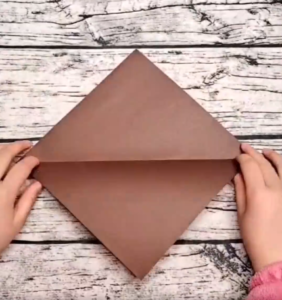
- Fold the paper diagonally like this.
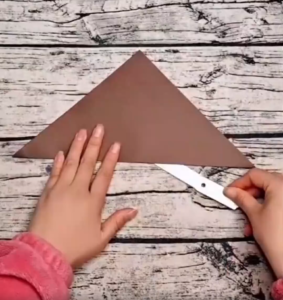
- Then, help your child cut along the fold of the paper with the help of safety scissors.
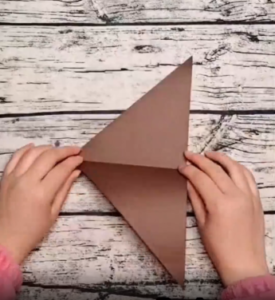
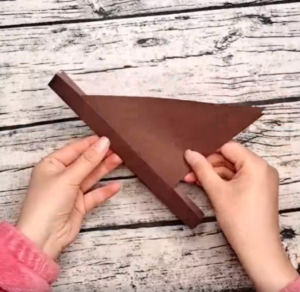
- Take up one triangle from the cut paper, and fold it in half. Be sure the edges and corners are lined up perfectly. These are the wings of the bird.
- Next, from coloured paper or newspaper, cut out 3 rectangles that are 1.5 inches wide and about 5 to 6 inches long. If using newspaper, let your child paint the cut-outs in the same colour as the bird’s wing (or any other shade, if he wants to get creative!). Let it dry.
- Then, take one of these rectangles, and keep the other two aside for later use.
- Fold that one rectangle vertically in half, and place the wings, short side down, into the rectangle’s fold (see image for reference).
- Paste the folds of the rectangle together, with the wings in the middle. But don’t paste the wings together otherwise, the little birdie won’t be able to fly!
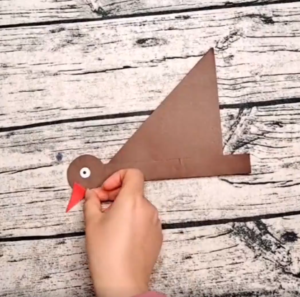
- Next, let’s make the face of the bird. Draw and cut out a bowl-sized circle from your paper of choice. Cut out a small circle for an eye and a little triangle for the beak.
- If you haven’t used coloured paper, let your child paint the head in either the same colour as the rest of the body or a different colour. Paint the beak orange and the eye white and black (see image for reference).
- Paste the head at one end of the rectangle. Then, paste the eye and beak on it.
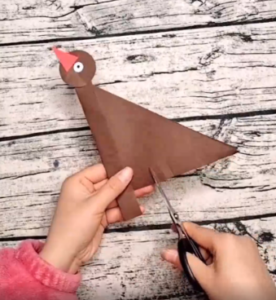
- Next, with a pair of scissors, help your child make little parallel cuts in both wings to give them mobility to fly.
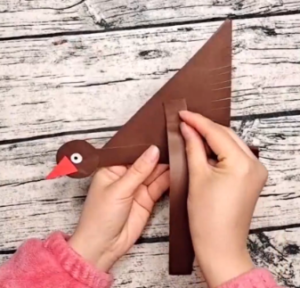
- And, lastly, remember those two rectangles you had set aside? Bring them back, and paste one rectangle vertically on each wing (see image). This will make the bird ‘fly’!
- Viola, your bird is ready for takeoff!
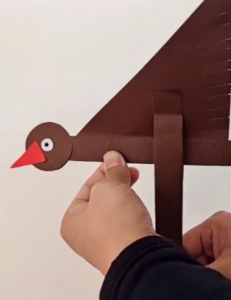
How cool was that for your little one? He now knows how to make flying birds!
ADVERTISEMENTS


