There are plenty of lovely painting projects that you can do with your little one at home, using commonly available items. Plastic bottles, bubble wrap, rolling pins, sponges, and even paper plates can be used in these art projects! Doesn’t that sound like fun? Let’s have a look at 10 such creative activities!
Thank you for reading this post, don't forget to subscribe!
- Sponge Painting
Age group: 2 – 3 years, 3 – 4 years

What you need:
- Sponge
- Paints
- Paintbrushes and containers/palette
- Big sheet of plain paper/newspaper
Instructions:
- First, take out a few different colours in different containers. If you want to make a rainbow, then take out those colours.
- Next, help your child (or do it yourself) apply the paints to the sponge with the help of a big, thick paintbrush. To make a rainbow, apply the colours in the order they appear in a rainbow!
- Then, all that’s left to do is give your child the painted sponge, and let him run it all over the plain paper/newspaper, in whatever pattern he wants!
2. Bubble Wrap Painting
Age group: 2 – 3 years, 3 – 4 years

What you need:
- Bubble wrap pieces
- Paints
- Paintbrushes and containers
- Plain paper
- Scissors
Instructions:
- Start by cutting up the bubble wrap into small pieces. If you like, you can cut it up into different shapes like circles, squares, triangles, stars, etc.
- Next, take out different coloured paints in separate containers.
- Then, let your child pick out a piece of bubble wrap, and help him apply paint to the bubble-y side of it with a paintbrush.
- Help him press the painted side onto the plain paper (not too firmly, as the bubbles might pop!)
- Repeat this with other shapes and colours, till the paper is filled!
3. Splatter Painting
Age group: 2 – 3 years, 3 – 4 years, 4 – 6 years
What you need:
- Paints
- Water
- Containers
- Paintbrush/spoon
- Large canvas (chart paper/newspaper/cardboard/old bedsheets or clothes)
Instructions:
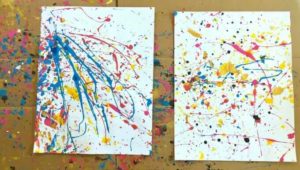
- First, lay out the painting zone. You can do it outside in your garden or balcony, or indoors. Make sure to lay down old newspapers or cloths to catch the splatters of paint that don’t make it onto the canvas.
- Using old bedsheets or t-shirts as the canvas are great recycling ideas, not to mention very exciting for your child to be able to paint on cloth!
- Next, take out different paints in separate containers, and water them down to make them more fluid and thus easier to splatter.
- Then, simply hand your child a paintbrush or a spoon, show him how to flick his wrist and ‘throw’ the paint at the canvas, and sit back and watch him go at it!
4. Spin Art
Age group: 3 – 4 years, 4 – 6 years

What you need:
- Paints
- Paper plates
- Plain paper
- Paintbrushes
- Containers/palette
Instructions:
- First, help your child take out different paints in separate containers.
- Then, using a paintbrush, let him apply dollops of paint to the outer surface of a paper plate. You can use multiple paper plates and multiple colour combinations!
- Lastly, on a sheet of paper, turn over the plate with the paint side down. Let your child spin and slide and twirl the plate around the paper to make colourful patterns and designs!
5. Rolling Pin Art
Age group: 3 – 4 years

What you need:
- Paints
- Plain paper/newspaper
- Rolling pin
Instructions:
- For this super simple activity, join some sheets of paper or newspaper together to make a large canvas for your child.
- Then, drop or squirt different paints all over the canvas.
- And then, give your child a rolling pin, and let him roll it over the paints on the canvas, having plenty of colourful and creative fun!
6. Shaving Foam Marble Painting
Age group: 3 – 4 years, 4 – 6 years

What you need:
- Paints
- Shaving foam
- Water
- Wide and shallow container
- Plain paper
- Cardboard
- Paintbrush/wooden stick
- Dropper (optional)
Instructions:
- Begin by spreading a layer of shaving foam on the bottom of the wide and shallow container.
- Take some paints out in separate containers, and add a little water to them to make them more fluid.
- Then, with the help of a dropper or a paintbrush, let your child drop dots of the different paints all over the shaving foam layer.
- With a wooden stick or the bottom of a paintbrush, he can swirl around the paints in the shaving foam to get a ‘marbled’ look (think of what marble cake looks like!).
- Press a piece of plain paper into the shaving foam-paint mixture, then lift it up and turn it over. With a piece of cardboard, swipe away the shaving foam and put it back in the dish.
- You’ll be left with paper that is beautifully marbled and colourful! Let dry. Repeat with different colours!
7. Bag Painting
Age group: 2 – 3 years, 3 – 4 years
What you need:
- Paints
- Plain paper/newspaper
- Pencil and scissors
- Plastic zip-locked baggy
Instructions:
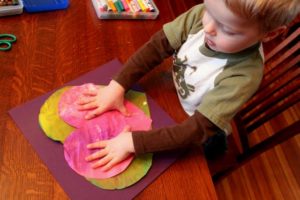
- First, draw and cut out the shape of a heart, circle, star, or any other object from plain paper or newspaper.
- Then, take a big plastic bag with a ziplock, and have your child put the cutout inside. Help him drop or squirt some paints in there, too.
- Now, it’s a fun time for your child! Zip up and secure the bag well, and then let him squish, squeeze, crumple, shake, and roll the bag however he wants.
- When he’s done, open the bag carefully, and make sure that the cutout is completely coated with paint. Take it out carefully, and leave it to dry.
8. Ice Cube Painting
Age group: 2 – 3 years, 3 – 4 years

What you need:
- Paints
- Water
- Ice trays
- Wooden sticks
- Plain paper
Instructions:
- First, let’s make the paint ice cubes. In an ice tray, add different paints in separate compartments. You can add other colours on top if you like. Top them all off with a little water, and freeze for 20 minutes. Then, add a wooden stick to each compartment, and then freeze for 4 to 6 hours. Take more time if needed!
- Once the paint cubes are ready, all there is to do is hand your child a painted cube on a stick, and let him run it as he wants over a sheet of paper!
- This activity is great for hot summer days, but keep an eye on your child, in case he decides he wants to lick the paint ice cube!
9. Plastic Bottle Painting
Age group: 2 – 3 years, 3 – 4 years
What you need:
- Paints
- Plastic soda/water bottle
- Plain paper
- Containers
Instructions:
- Lay out some paints in separate containers.
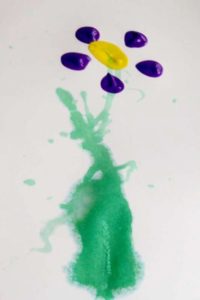
- On a sheet of paper, help your child draw/paint some flower stems and leaves. Let dry.
- Then, help him dip the bottom of a plastic soda/water bottle into some paint, and press it onto the top of the flower stems to make the petals. Let dry.
- As the last step, your child can dip his finger or thumb in some paint, to make the middle portion of the flower head (between the petals!).
10. Q-Tip Painting
Age group: 3 – 4 years, 4 – 6 years
What you need:
- Paints
- Q- tips or earbuds
- Plain paper
- Containers
- Pencil
- Scissors (optional)
Instructions:
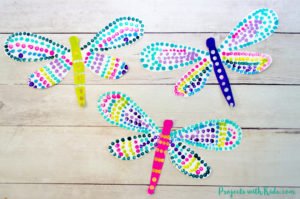
- First, help your child draw some butterflies or dragonflies on a sheet of plain paper. You can either cut them out or let them be on the paper.
- Next, take out some paints in separate containers.
- Paint the bodies of the butterflies/dragonflies, but let the wings remain plain. Let dry.
- Then, take some earbuds, and help your child to dip one tip into one colour and press it several times onto a wing (see image for reference).
- Repeat this with other colours, and encourage your child to make patterns if he can!
Hours of painting fun sorted!


